
Master bird photography in India with our beginner guide. Learn essential gear, field settings, prime locations like Sattal and Bharatpur, and ethical rules.
Core Gear Essentials & Equipment Strategy
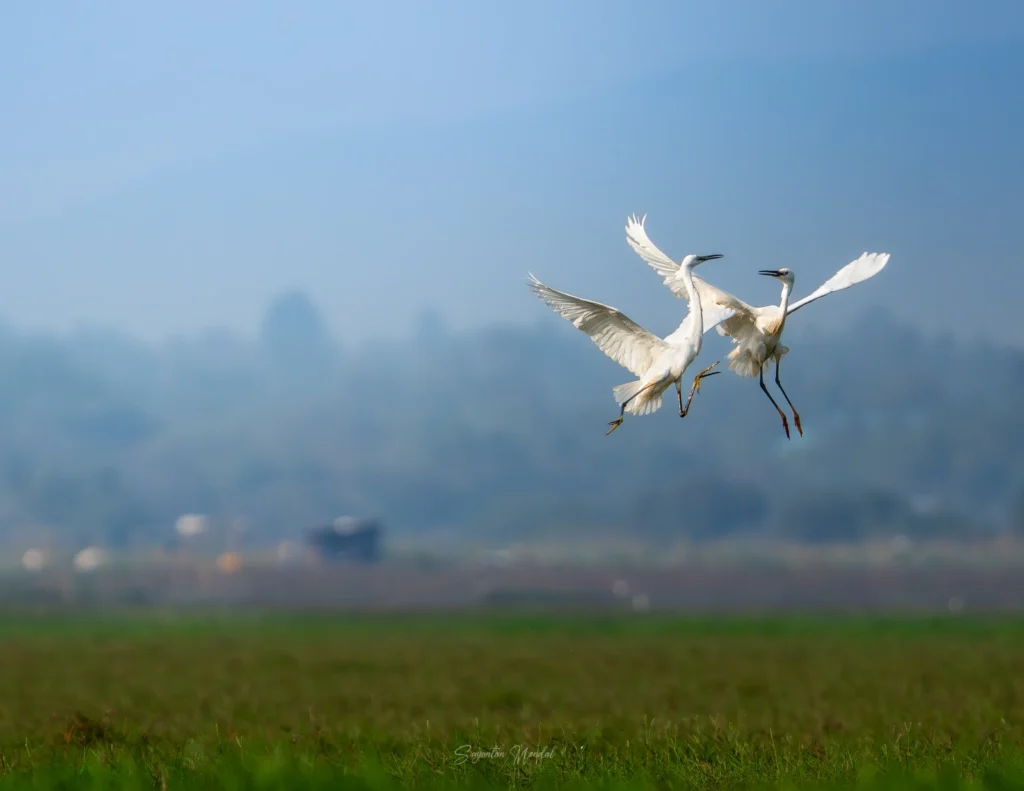
India supports an avian population of 1,396 recorded bird species, including 83 endemics. This sheer diversity—ranging from high-altitude Himalayan pheasants to resident hornbills in the Western Ghats and vast wintering flocks of migratory waterfowl across peninsular wetlands—makes the subcontinent one of the most rewarding regions in the world for bird photography.
However, birds are small, fast-moving, naturally skittish, and frequently active in low-contrast dawn lighting or shaded forest canopies. Successfully photographing them requires a balance of proper focal reach, autofocus reliability, field patience, and an understanding of bird biology. You do not need top-of-the-line professional equipment to begin, but you do need an intentional gear strategy tailored to avian subjects.
Bird Photography Gear Foundation
├── Camera Body: Fast AF tracking + 1/2000s minimum shutter speed
├── Telephoto Lens: 400mm practical minimum (500–600mm ideal for wetlands)
├── Support: Sturdy tripod with fluid/gimbal head (for stationary/hide work)
└── Field Scouting: 8×42 or 10×42 binoculars for habitat scanning
What Equipment Do You Need to Start Bird Photography?
Bird photography places greater demands on optical reach and autofocus performance than almost any other genre of outdoor photography.
Before investing in expensive systems, ensure your camera body meets three baseline technical capabilities:
- Shutter Speed Capacity: The camera must offer mechanical or electronic shutter speeds reaching at least 1/2000s (with 1/4000s or faster preferred for erratic flyers).
- Continuous Autofocus (AF-C / AI Servo): Modern bird photography relies heavily on tracking moving subjects across the frame. Dedicated animal-eye or bird-detection autofocus is now common in mirrorless bodies and dramatically increases your keeper rate.
- Burst Rate (Frames Per Second): A minimum continuous burst rate of 7 to 10 frames per second (fps) is needed to capture critical wing positions during takeoffs, landings, and feeding behavior.
Naturalist Field Note: Crop-sensor bodies (APS-C and Micro Four Thirds) provide an inherent field-of-view advantage for bird photographers. An APS-C camera with a 1.5x (Nikon/Sony) or 1.6x (Canon) crop factor turns a 400mm lens into a 600mm or 640mm full-frame equivalent field of view, giving you extra reach on smaller subjects without additional glass weight.
Camera Recommendations for Indian Conditions
The right camera body provides dependable tracking autofocus and manageable file handling under tough Indian field conditions—including high summer temperatures, winter river mist, and pervasive dust.
Camera Body Selection
├── Entry-Level Mirrorless (₹50,000–₹100,000): Canon EOS R10, Nikon Z50 II, Sony A6400
├── Mid-Range Powerhouses (₹150,000–₹300,000): Canon EOS R5, Nikon Z8, Sony A7 IV
└── Budget / Bridge Entry: Panasonic Lumix FZ80 / FZ80D or existing DSLR bodies
Entry-Level Mirrorless Bodies (₹50,000–₹100,000)
- Canon EOS R10: Features Canon’s Dual Pixel CMOS AF II with sophisticated subject detection algorithms for animals and birds. It delivers up to 15 fps with the mechanical shutter and 23 fps with the electronic shutter, making it one of the most capable budget wildlife bodies available.
- Nikon Z50 II: Built around a reliable 20.9 MP DX sensor, this body combines accessible ergonomic handling with Nikon’s updated autofocus tracking, well-suited for beginners transitioning from smartphones or older DSLRs.
- Sony A6400: Compact and proven, the A6400 offers dependable Real-Time Tracking autofocus and broad compatibility with native and third-party E-mount telephoto zooms.
Mid-Range Powerhouses (₹150,000–₹300,000)
- Canon EOS R5: A favorite among wildlife professionals, offering a 45 MP full-frame sensor that allows significant post-capture cropping, paired with rapid deep-learning bird-eye autofocus.
- Nikon Z8: Incorporates flagship stacked-sensor technology with virtually no rolling shutter, high-speed burst capabilities up to 20 fps in RAW, and rugged weather sealing suitable for extreme dust and humidity.
- Sony A7 IV: A well-balanced 33 MP full-frame option featuring dedicated Bird Eye AF in both photo and video modes, supported by a vast ecosystem of native telephoto lenses.
Budget and Bridge Camera Alternatives
If you already own an entry-level DSLR (such as a Canon EOS 200D/1500D or Nikon D3500/D5600), keep the body and direct your budget entirely toward a telephoto lens. For those seeking an all-in-one bridge camera without interchangeable lenses, superzoom models like the Panasonic Lumix FZ80 / FZ80D offer substantial reach at an accessible price point, though they feature smaller sensors with lower performance in deep forest shade.
Camera Body Comparison
| Camera Body | Sensor Format | Max Burst Rate | Subject Detection AF | Weight (Body Only) | Best Suited For |
| Canon EOS R10 | APS-C (24.2 MP) | 15 fps (Mech) / 23 fps (Elec) | Animals / Birds | ~429 g | First-time birders wanting high speed and reach |
| Sony A6400 | APS-C (24.2 MP) | 11 fps | Real-Time Tracking | ~403 g | Compact travel setups and third-party lens access |
| Nikon Z50 II | APS-C (20.9 MP) | 11 fps | Subject Tracking AF | ~450 g | Beginners wanting straightforward controls |
| Sony A7 IV | Full-Frame (33 MP) | 10 fps | Real-Time Bird Eye AF | ~658 g | Serious enthusiasts wanting cropping flexibility |
| Canon EOS R5 | Full-Frame (45 MP) | 12 fps (Mech) / 20 fps (Elec) | Advanced Animal Eye AF | ~738 g | High-resolution wildlife specialists |
| Nikon Z8 | Full-Frame (45.7 MP) | 20 fps RAW / 30 fps JPEG | Advanced Wildlife AF | ~910 g | Action and flight photography in tough conditions |
Lens Selection: Why 400mm is the Practical Starting Point
The lens is the single most important investment in bird photography. While landscape and portrait photographers can work with standard focal lengths, wild birds in India maintain distinct flight-initiation distances. Approaching too close causes unnecessary stress to the animal and usually results in the bird flying away before you can focus.
Focal Length Practical Utility
├── 300mm: Minimum for tame garden birds, large storks, and close hides
├── 400mm: The practical entry baseline for woodland and general birding
└── 500–600mm: Essential reach for wetland waterfowl, waders, and raptors
The 400mm Minimum Standard
A focal length of 400mm represents the realistic starting point for general bird photography. At 400mm, you have sufficient reach to fill a reasonable portion of the frame with mid-sized birds (such as drongos, mynas, and parakeets) from a comfortable distance, without forcing the bird to flee.
Reaching Distant Birds: 500mm to 600mm Zooms
For open wetlands (such as Bharatpur, Chilika, or Thol Lake) and coastal mudflats, 400mm often leaves smaller waders and ducks looking like specks in the frame. Modern 150–600mm and 200–600mm telephoto zooms have revolutionized beginner bird photography by providing 600mm of reach at accessible prices.
Lens Architecture Tradeoffs
├── Telephoto Zooms (100–400mm, 150–600mm, 200–600mm)
│ ├── Pros: Versatile framing, portable, cost-effective (₹60,000–₹1,60,000)
│ └── Cons: Variable maximum apertures (f/5.6 to f/6.3) requiring more light
└── Prime Lenses (400mm f/2.8, 500mm f/4, 600mm f/4)
├── Pros: Superior optical sharpness, wide apertures for low light
└── Cons: Heavy, fixed composition, high cost (₹3,00,000+)
Recommended Telephoto Lenses
- Sony FE 200-600mm f/5.6-6.3 G OSS: An internal-zoom super-telephoto lens for Sony E-mount. Because the barrel does not extend during zooming, it maintains its balance on tripods and resists dust ingress exceptionally well.
- Nikon AF-S 200-500mm f/5.6E ED VR / Nikkor Z 180-600mm f/5.6-6.3 VR: The 200-500mm f/5.6 remains a popular choice on the F-mount, offering a constant f/5.6 aperture across the entire zoom range. The native Z 180-600mm provides faster autofocus on Z-series mirrorless bodies.
- Canon RF 100-400mm f/5.6-8 IS USM & EF 100-400mm f/4.5-5.6L IS II USM: The budget RF 100-400mm is remarkably light (approx. 635 g), making it ideal for long walking safaris, while the L-series 100-400mm remains an exceptionally sharp workhorse.
- Sigma 150-600mm f/5-6.3 DG OS HSM Contemporary / Sports: A versatile third-party telephoto zoom available across multiple mounts, delivering 600mm reach within budget reach.
Telephoto Lens Comparison
| Lens Model | Mount System | Focal Range | Max Aperture | Weight | Image Stabilization | Primary Strength |
| Canon RF 100-400mm IS USM | Canon RF | 100–400mm | f/5.6–8 | ~635 g | Optical (5.5 stops) | Lightweight, handheld trail walking |
| Canon EF 100-400mm L IS II | Canon EF/RF* | 100–400mm | f/4.5–5.6 | ~1,570 g | Optical (4 stops) | Rugged build, pro-grade optics |
| Nikon AF-S 200-500mm ED VR | Nikon F/Z* | 200–500mm | f/5.6 constant | ~2,300 g | Optical (4.5 stops) | Constant f/5.6 aperture across zoom |
| Sony FE 200-600mm G OSS | Sony E | 200–600mm | f/5.6–6.3 | ~2,115 g | Optical SteadyShot | Internal zoom, fast tracking AF |
| Sigma 150-600mm Contemporary | Multi-mount | 150–600mm | f/5–6.3 | ~1,930 g | Optical Stabilizer | Maximum reach per rupee |
| Canon EF 400mm f/2.8L IS III | Canon EF/RF* | 400mm prime | f/2.8 | ~2,840 g | Optical (5 stops) | Unmatched low-light speed and background blur |
*Via native manufacturer mount adapter.
Essential Field Accessories
A telephoto lens and camera body form the core of your kit, but three supporting accessories directly affect your field success and overall endurance.
Essential Support Kit
├── Tripod with Gimbal/Fluid Head: Reduces muscle fatigue on long stakeouts
├── Field Binoculars (8×42 or 10×42): Detects movement before raising the camera
└── Portable Hide / Camouflage Cover: Breaks human outline near waterholes
1. Tripods and Support Heads
Long telephoto lenses (especially 500mm and 600mm zooms) weigh between 1.8 kg and 2.5 kg. Handholding a 3.5 kg camera-and-lens combination for four hours leads to muscle fatigue, camera shake, and missed shots.
- Tripod Construction: Choose a sturdy aluminum or carbon-fiber tripod without a center column (or with a removable one) to allow shooting from low ground levels.
- Fluid or Gimbal Heads: Avoid standard ball heads for heavy telephoto lenses; loosening a ball head can cause a front-heavy lens to tip over instantly. Use a gimbal head or a counterbalanced fluid video head (such as the Cayer FP2450 or Andoer Video series), which keeps the lens perfectly balanced and weightless in motion.
Photography Tip: For fast-moving birds in flight along open trails, shooting handheld with a stabilized 100–400mm lens often offers greater tracking speed than a tripod. Use a tripod primarily for stationary birds, hide sessions, low-light dawn periods, and prolonged waterhole stakeouts.
2. Field Binoculars
Never use your camera viewfinder as your primary scanning tool. Searching through a narrow 400mm field of view is inefficient and quickly strains your eyes. Keep a pair of 8×42 or 10×42 roof-prism binoculars around your neck. Use your binoculars to scan branches, observe flight trajectories, and locate perches; once you spot your subject, raise your camera to frame the shot.
3. Photographic Hides and Blinds
Birds have keen eyesight and recognize human silhouettes immediately. In established birding hubs like Sattal, communal hides (such as the Wild Kumaon Bird Hide) place photographers behind one-way glass or camouflaged mesh, allowing birds to feed, bathe, and drink without feeling threatened. For open wetland edges or backyard setups, a simple pop-up camouflage tent or a fabric scrim breaks your outline and brings birds within natural telephoto range without causing disturbance.
Field Settings, Lighting Cycles & Avian Behavior
Having the right camera and telephoto lens is only the first step. To capture sharp images of erratic subjects, you must configure your camera settings specifically for wildlife action. Standard landscape or portrait modes will not freeze a bird in flight or manage the rapid light fluctuations found in Indian forests.
Mastering Camera Settings for Wild Birds
You must take control of your exposure settings. While fully Manual mode offers the greatest control over shutter speed, aperture, and ISO, learning to use priority modes accelerates your reaction time in the field. Use Shutter Priority when tracking moving or flying birds to ensure a fast shutter speed. Switch to Aperture Priority for resting birds to control the depth of field and isolate the subject.
Exposure Baseline Settings by Behavior
| Avian Behavior | Shutter Speed | Aperture | Ideal ISO | Reason |
| Perched / Stationary | 1/1000s minimum | f/2.8–f/5.6 | 200–800 | Freezes sudden twitches; wide aperture isolates subject. |
| Moving on Ground | 1/1000s+ | f/5.6 | 200–800 | Captures basic action like foraging or walking. |
| Flight / Flapping | 1/1600s–1/4000s | f/5.6–f/8 | 400–1600 | Freezes rapid wing beats; f/8 provides a deeper focus area. |
| Diving (e.g., Kingfisher) | 1/2000s–1/4000s | f/5.6–f/8 | 800–1600 | Requires extremely fast shutter speeds for rapid action. |
| Small Bird (Close Range) | 1/4000s–1/5000s | f/5.6 | 800–3200 | Closer proximity exaggerates the speed of subject motion. |
| Large Bird (Far Away) | 1/2000s | f/8 | 400–800 | Distance visually slows motion, allowing slightly slower speeds. |
Expert Tip: On a bright sunny day, a good starting point is an aperture of f/5.6 and an ISO of 200–400. This should naturally result in a shutter speed of 1/1000s or faster, which is required to freeze resting or moving birds.
The Auto ISO Strategy with Capped Thresholds
Light changes constantly during a safari. A bird may fly from a sunlit branch into deep canopy shade in seconds. Manually adjusting ISO for every exposure is inefficient and often results in missed shots.
Instead, use your camera’s Auto ISO function with a defined strategy:
- Set the Minimum Base ISO: Set this to your camera’s lowest native ISO (usually ISO 100) for the best image quality in bright light.
- Set the Maximum Limit: Cap the Auto ISO at 1600 or 3200 to handle light fluctuations while managing digital noise. For deep shade, a maximum of 6400 is recommended to prevent excessive grain while ensuring the shutter speed remains fast enough.
- Dawn and Dusk Adjustments: Do not fear raising your ISO during low-light hours. Acceptable noise at ISO 800–1600 is vastly preferable to a blurry, unusable image caused by a slow shutter speed.
Working with Light: Golden Hours and Sun Angles
In bird photography, the quality of light dictates the quality of the image. The harsh midday sun in India creates harsh shadows, washes out plumage colors, and causes heat haze that ruins image sharpness. Instead, focus your efforts on specific time windows.
The Morning Feeding Window (6:00 AM – 9:00 AM)
The first two to three hours after sunrise represent the best time for bird photography. During this window, the sun’s low angle provides the best colors and contrast.
Biologically, this is also when birds are most active. The warming sun activates insects, prompting insectivorous birds to feed aggressively. Whether you are shooting in the lower Himalayas at Sattal or a wetland like Thol Lake, maximizing your time between sunrise and 9:30 AM yields the highest success rate.
Late Afternoon Activity (4:00 PM – 6:00 PM)
If you miss the morning window, late afternoon provides a secondary opportunity. The hours between 4:00 PM and 6:00 PM are highly rewarding, especially near water edges and grasslands.
This period acts as an evening supper spell, where birds become active again to feed before roosting for the night. The sinking sun casts warm tones across the landscape, providing excellent frontal or side lighting depending on your positioning.
Field Note: Avoid shooting in the middle of the day. High temperatures cause birds to retreat into deep foliage to rest, making them difficult to find and photograph.
Decoding Avian Behavior for Better Action Shots
Understanding your subject’s habits allows you to anticipate action rather than merely reacting to it. Studying local birds—especially common backyard or urban species—is the fastest way to improve your hit rate. Areas that offer abundant prey and water serve as the main attractions for bird activity.
Predictable Perching: The Green Bee-Eater
Many insectivorous birds have specific hunting habits. The Green Bee-Eater, for example, frequently perches in one spot, flies out to catch an insect, and returns to the exact same branch.
- The Strategy: Do not chase the bird. Wait at its preferred perch, pre-check your exposure settings, and anticipate its return.
Waterline Ambush Tactics: The Kingfisher
Kingfishers are ambush predators. They sit patiently at the edges of water bodies or small ponds, waiting for prey to surface.
- The Strategy: Station yourself at the water’s edge and focus on the bird. When it dives, you need extremely fast shutter speeds (1/2000s–1/4000s) to freeze the action upon its exit from the water.
Anticipating Takeoffs and Flight Paths
Capturing a sharp flight shot requires anticipating wing beats, takeoffs, and landings. Ground-dwelling birds like larks and wagtails in grasslands feed on insects and often flush suddenly.
- The Strategy: Use your camera’s burst mode to take pictures in rapid succession. If your mirrorless camera features a “Pro Capture” or pre-burst mode (such as on OM System bodies), enable it. This feature begins buffering images before you fully press the shutter, allowing you to capture the exact millisecond a bird takes flight.
Top Beginner Locations in India & Composition Techniques
Once your gear is assembled and your settings are configured, the next step is choosing the right environment. India’s vast geography offers specialized habitats, but not all of them are suited for a beginner. Dense, dark rainforests require expensive, fast lenses and advanced tracking skills. Instead, start your journey in accessible habitats that offer clear visibility, predictable light, and a high density of comfortable subjects.
Prime Beginner-Friendly Birding Locations in India
The best locations for learning bird photography offer open perches, established trails, and birds that are somewhat accustomed to human presence.
Sattal, Uttarakhand: The Himalayan Forest Classroom
Sattal is widely considered one of India’s best birding destinations for forest species. Located in the lower Himalayas, it offers low-to-medium altitude terrain with spectacular avian diversity.
- Species Count: The region hosts over 300 bird species.
- Best Season: Visit between November and February to photograph winter migrants.
- The Advantage: Sattal provides open perches and excellent natural light. The area also features established communal hides—such as the Wild Kumaon Bird Hide—designed to blend into the environment, allowing for close, undisruptive observation.
Keoladeo National Park (Bharatpur), Rajasthan: The Winter Wetland Haven
Formerly a royal duck-hunting reserve, this UNESCO wetland is now a premier sanctuary and a top recommendation for beginner bird photography.
- The Spectacle: Between November and March, the park serves as a winter migratory haven. It attracts thousands of migratory birds traveling from Central Asia.
- Target Species: Photographers can capture painted storks, pelicans, northern pintails, and the increasingly rare Siberian crane.
- The Advantage: The park features a network of flat, well-maintained walking trails and cycle paths, making it easy to maneuver a heavy tripod and long lens.
Thattekad Bird Sanctuary, Kerala: The Southern Forest Sanctuary
Founded by the legendary ornithologist Dr. Salim Ali, Thattekad is southern India’s most celebrated bird sanctuary.
- The Environment: It offers rich avian diversity concentrated within a compact forest setting.
- The Advantage: Because the forest is relatively compact rather than an endlessly dense rainforest, it provides an excellent introductory environment for photographing endemic Western Ghats species. The weather is most pleasant for photography between October and March.
Coastal Lagoons: Chilika and Pulicat Lakes
For expansive flocks of waterfowl and waders, India’s eastern coastal lagoons offer unmatched volume.
- Chilika Lake (Odisha): Between November and February, this massive wetland hosts hundreds of migratory waterfowl. As of January 2026, counts recorded 11.32 lakh birds at Chilika, including a massive congregation of 218,993 northern pintails.
- Pulicat Lake (Andhra Pradesh/Tamil Nadu): A brackish water lagoon known for its ecological richness. A January 2026 census recorded 52,000 birds here, including 16,500 greater flamingos. Waders peak in October, while flamingos are most abundant in April. The best lighting for photography here is between 6:00 AM and 9:00 AM.
Urban Parks and Backyard Birding
You do not need to travel across the country to start birding. Start where it is easiest and upgrade your locations as you learn.
- The Advantage: Over 20 urban bird species reside in city habitats nationwide. Subjects like the Indian Robin, House Sparrow, and Common Myna provide accessible practice for mastering your exposure triangle and autofocus tracking.
Beginner Birding Destinations Comparison
| Location | State | Best Season | Habitat Type | Key Photographic Advantage |
| Sattal | Uttarakhand | Nov–Feb | Lower Himalayan Forest | 300+ species, great light, established hides. |
| Bharatpur | Rajasthan | Nov–Mar | Wetland / Marsh | Well-maintained trails, massive migratory flocks. |
| Thattekad | Kerala | Oct–Mar | Compact Forest | High diversity without the extreme difficulty of dense rainforests. |
| Chilika Lake | Odisha | Nov–Feb | Coastal Wetland | Huge waterfowl volume (11.32 lakh wintering birds). |
| Thol Lake | Gujarat | Nov–Mar | Freshwater Lake | Excellent morning (sunrise–9:30 AM) and evening (4–6 PM) light. |
| Pangot | Uttarakhand | Oct–Mar | High-Altitude Forest | 250+ species, located just 15 km from Nainital. |
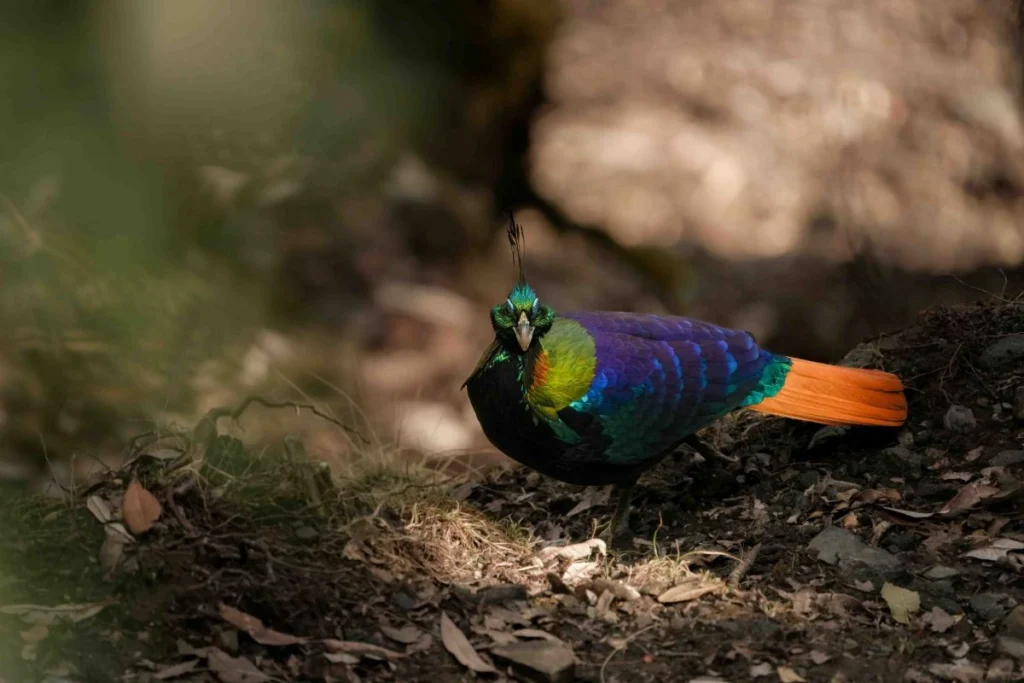
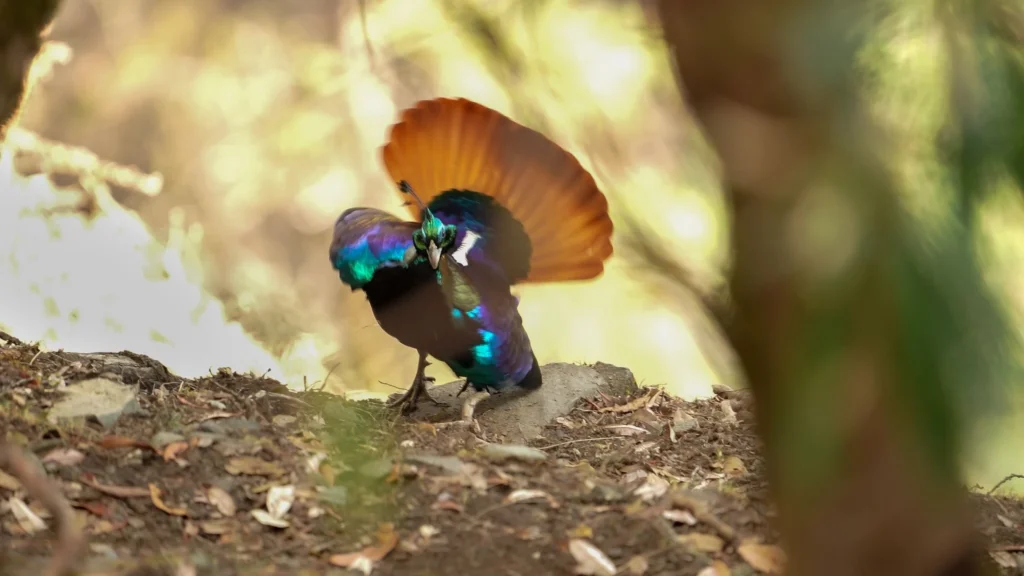
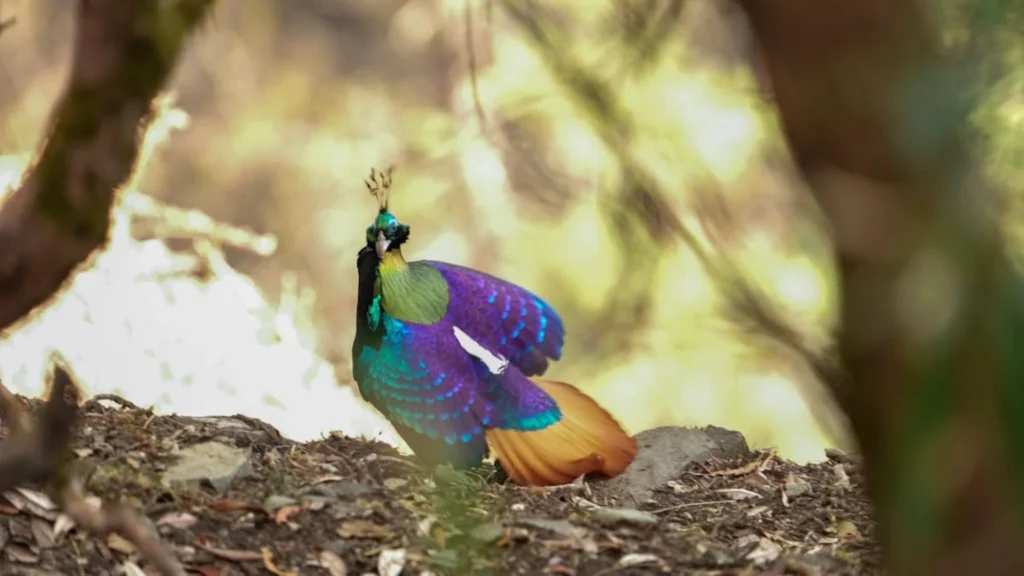
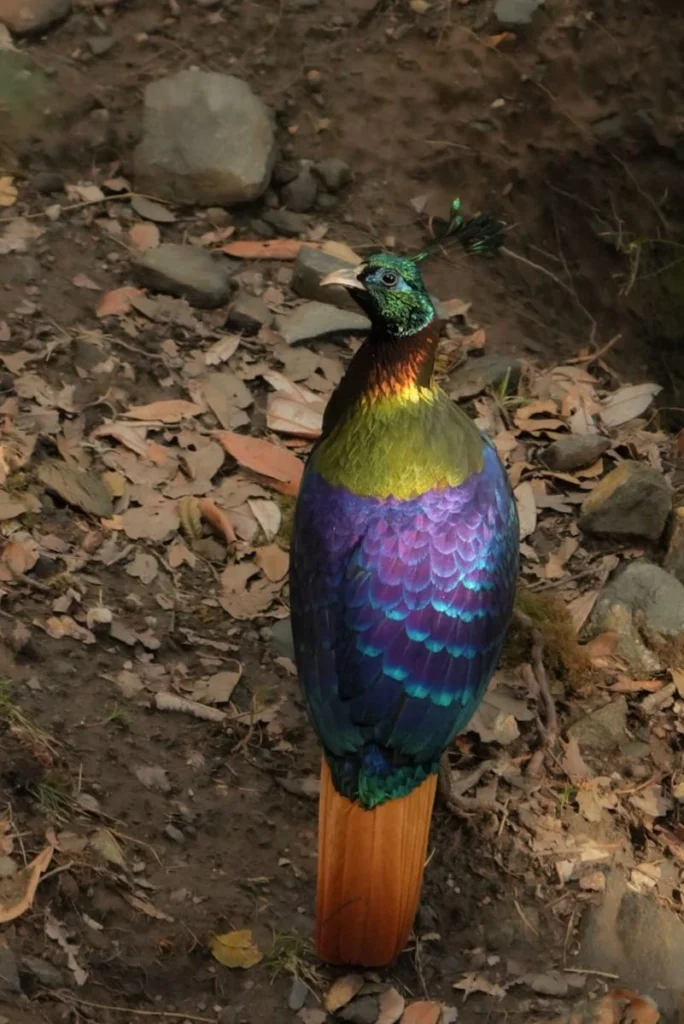
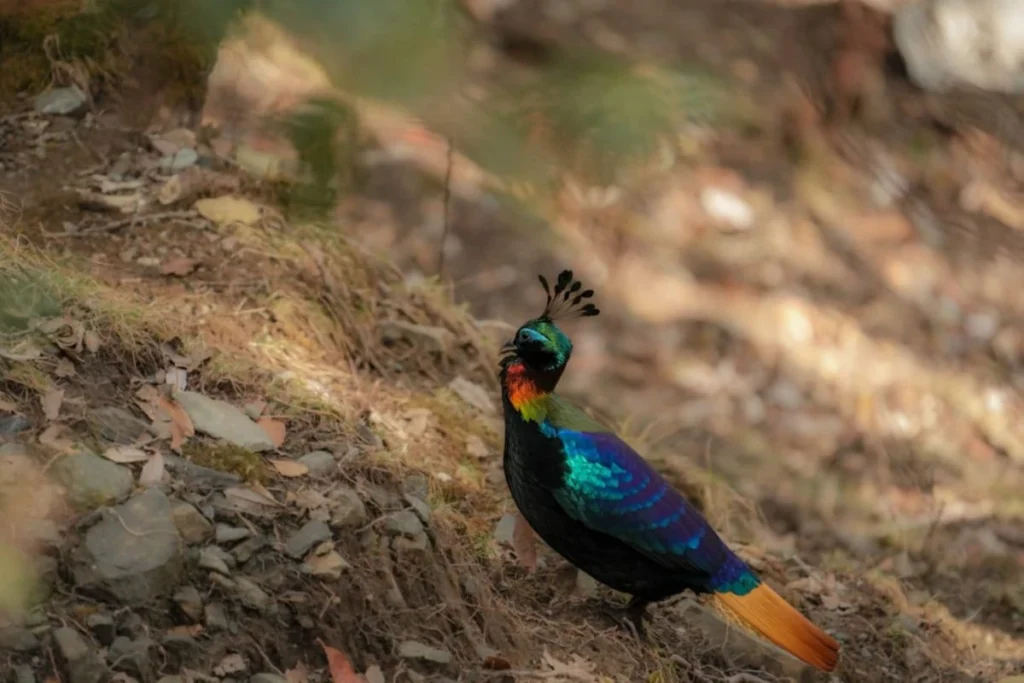
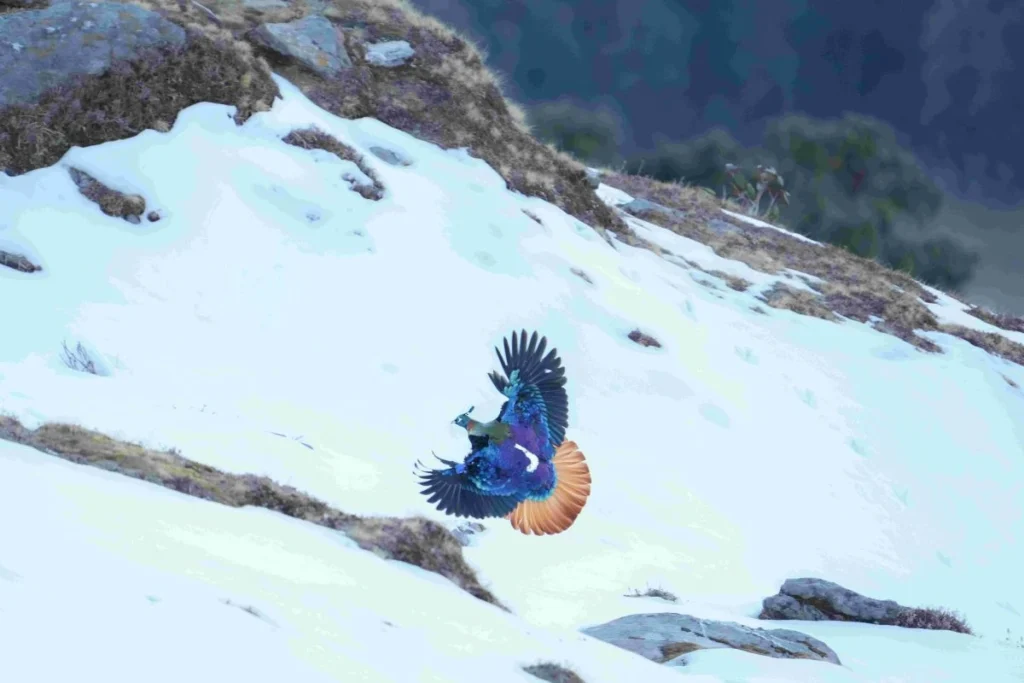
Birdwatching in the Himalayas : Himalayan Monal, Uttarakhand | Original Photographs by Anupam Datta | Shared with WildlifeSafaris.in
Composition Fundamentals in the Field
A sharp photo of a bird is a record shot; a well-composed photo is a wildlife portrait. Applying a few basic compositional rules elevates your images from amateur snapshots to professional-grade wildlife photography.
Shooting at Eye Level: The Low Perspective
The single most game-changing perspective technique in bird photography is getting on the bird’s level.
- The Mistake: Shooting from a standing height while the bird is on the ground forces an unnatural downward angle, resulting in photos of the top of the bird’s head and a flat, distracting ground background.
- The Fix: Lower your tripod or lie flat on the ground. Shooting at eye level makes the viewer feel as though they are inside the bird’s world and element.
The Rule of Thirds and Directional Space
Avoid placing the bird dead-center in every frame.
- The Grid: Imagine a tic-tac-toe grid over your viewfinder. Place the bird’s eye at one of the four intersection points. If the bird is perched on a branch, let the branch extend outward along one of the horizontal grid lines.
- Negative Space: Always leave room in the frame for the bird to “move into”. If a bird is looking or flying to the right, leave more empty space on the right side of the frame. This distraction space is critically important when a bird is looking directly toward the camera.
- Framing: Ensure your composition leaves enough space around the subject; do not accidentally cut off the beak, wings, or tail at the edge of the frame.
Background Separation and Bokeh
A cluttered background of sharp twigs and leaves distracts from the subject. To create a professional look with buttery, blurred backgrounds (bokeh), you need to isolate the subject.
- The Technique: Use the widest aperture available on your lens (such as f/2.8, f/4, or f/5.6) for sitting birds.
- Distance: The physical distance between the bird and the background matters. Even at f/5.6, if a bird is perched closely against a brick wall, the wall will remain somewhat sharp. If the bird is perched on a branch with open air or a distant forest canopy far behind it, the background will dissolve into a smooth, pleasing blur.
Field Ethics, Post-Processing, Common Pitfalls & FAQ
The final stages of bird photography occur before you press the shutter and after you return home. True wildlife photography requires a commitment to conservation ethics in the field, followed by a structured approach to post-processing your digital files.
Ethical Field Protocols and Nest Protection
The pursuit of a photograph must never come at the expense of the subject. Ethical bird photography operates on one non-negotiable rule: the bird comes first. Its safety, comfort, and natural behavior must never be compromised for an image.
Safe Distances and Field Behavior
Always use long telephoto lenses to maintain a safe distance rather than physically approaching the bird. If a bird changes its posture, suddenly freezes, or flies off, you have breached its comfort zone and are too close.
- Beach-Nesting Birds: Maintain a strict minimum distance of 25 yards (23 meters). If parents are forced to leave the nest, it creates an immediate risk of chick mortality from predators or exposure.
- Large Mammals: When birding in tiger reserves or national parks, maintain at least 50 meters from large mammals.
Flash and Playback Prohibitions
- No Flash Photography: Never use a flash, as it can disorient and temporarily blind birds. This is especially critical for nocturnal species like owls and nightjars.
- No Baiting or Playback: Never lure birds with food, and strictly avoid using audio playback calls. Calling birds away from their nests leaves eggs and chicks vulnerable. Playback should never be used with endangered birds or during the breeding season. Let the animals be themselves.
Nest Photography Guidelines
Photographing birds at the nest requires advanced knowledge of breeding behavior and extreme caution. Generally, it is best to avoid nest photography altogether. If attempted, you must follow strict guidelines:
- Never use wide-angle or macro lenses near a nest; a minimum focal length of 500mm is mandatory.
- Always use a camouflage hide if there is any reasonable doubt that the birds might alter their normal breeding behavior.
- Many species require the hide to be set up incrementally over at least one week to allow the birds to acclimate.
Protecting Location Data
Before sharing images of rare or sensitive species online (such as owls or nesting raptors), strictly remove the GPS metadata from your files. Broadcasting exact coordinates often leads to overcrowding by photographers, which severely stresses the bird and degrades its habitat.
Ethical Field Guide: Quick Reference
| Action | Ethical Protocol | Consequence of Violation |
| Approach | Use long lenses; back away if the bird freezes. | Unnecessary stress; forces the bird to expend vital energy flying away. |
| Beach Nests | Maintain a 25-yard (23m) minimum distance. | Parent leaves the nest, exposing chicks to heat or predators. |
| Audio Lures | Do not use playback calls, especially near nests. | Distracts territorial birds; leaves nests vulnerable. |
| Lighting | Rely exclusively on natural light; no flash. | Disorients birds and disrupts nocturnal hunters. |
| Sharing | Remove GPS data for rare species. | Triggers overcrowding and habitat trampling. |
Post-Processing Bird Photographs
A digital sensor records data flatly to maximize dynamic range. Post-processing is not about altering reality; it is about restoring the contrast, color, and sharpness that your eye naturally perceived in the field.
The RAW vs. JPEG Imperative
Always set your camera to shoot in RAW format rather than JPEG. JPEGs are compressed files processed in-camera, throwing away valuable shadow and highlight data. RAW files retain all image data, providing maximum flexibility to adjust exposure and recover details during post-processing.
Adobe Lightroom Workflow
Adobe Lightroom remains the industry standard for processing bird photography. A standard workflow includes:
- Exposure and Contrast: Adjust the overall exposure to correct for the cool tones of dawn or the warmth of the golden hour.
- Color Correction: Enhance the natural plumage colors slightly, being careful not to oversaturate the image.
- Subject Isolation: Use masking tools to subtly darken or blur the background, which helps isolate the bird and make it stand out.
- Metadata Management: Ensure your final file includes metadata noting the bird species, location, and time captured.
Topaz Photo AI for Noise and Sharpness
Because bird photography frequently requires high ISO settings (like ISO 1600 or 3200) to maintain fast shutter speeds, digital noise is inevitable. Topaz Photo AI is widely used by wildlife photographers specifically for its AI-powered noise reduction and detail recovery. It is exceptionally useful as a final post-processing step for low-light images or heavily cropped flight shots.
Common Beginner Mistakes to Avoid
| The Mistake | The Consequence | The Solution |
| Wearing Bright Clothing | Bright colors immediately signal your presence, scaring birds away. | Wear muted colors like olive green, brown, or grey to blend into the environment. |
| Moving Quickly | Sudden, jerky movements trigger a bird’s flight response. | Move slowly and patiently. Remaining completely still effectively makes you invisible to birds. |
| Making Noise | Loud conversations and phone alerts frighten skittish species. | Keep noise to an absolute minimum and turn off cellular phones. |
| Shooting Midday | Harsh sunlight causes heavy shadows, heat haze, and low bird activity. | Limit shooting to the golden hours: 6:00–9:00 AM and 4:00–6:00 PM. |
| Ignoring Local Species | Traveling far without understanding bird behavior results in missed opportunities. | Start by photographing common urban birds in your backyard and study a local field guide. |
Frequently Asked Questions (FAQs)
What is the minimum lens required for bird photography in India? A focal length of 400mm is the practical minimum starting point. Anything shorter will force you to approach too closely, scaring the birds. For wetland locations like Bharatpur or Chilika, a 500mm or 600mm lens is ideal.
What shutter speed should I use for birds in flight? To freeze rapid wing beats, use a minimum shutter speed of 1/1600s, though 1/2000s to 1/4000s is often necessary for smaller, faster birds or diving kingfishers.
Is 6:00 AM to 9:00 AM strictly the best time for bird photography? Yes. The first two to three hours after sunrise offer the best soft light, rich colors, and the highest peak of bird activity as they begin their morning feeding.
Are locations like Sattal and Bharatpur good for beginners? Both are excellent. Sattal offers over 300 species in lower Himalayan forests with open perches and established hides, while Bharatpur offers flat, well-maintained trails and thousands of wintering migratory birds between November and March.
Can I use a smartphone for bird photography? Yes, but largely for practice. You can successfully photograph common urban species (like pigeons, sparrows, and mynas) in your backyard or local parks to practice composition, though a smartphone will lack the optical reach required for wilder habitats.
What is the rule for photographing beach-nesting birds? You must maintain a minimum distance of 25 yards (23 meters). Getting closer often forces the parents to abandon the nest, which can lead to immediate chick mortality.
Conclusion: Starting Your Birding Journey
With 1,396 recorded species across the country, India offers a lifetime of bird photography opportunities. However, you do not need to book an expensive safari to begin. Start by securing a reliable 400mm lens, head into your local urban park or backyard during the early morning hours of 6:00 to 9:00 AM, and practice tracking common subjects like the Indian Robin or Common Myna.
As your skills develop, you can graduate to challenging forest environments like Thattekad or migratory havens like Bharatpur. Above all, remember that bird photography is fundamentally about observing nature, finding peace in the outdoors, and valuing ethical field practices just as highly as the final image. Enjoy the process.