
Master bird photography with proven shutter speeds, autofocus modes, lens recommendations, composition techniques, and top birding hotspots in India.
Introduction, Exposure Strategy & Autofocus Mastery
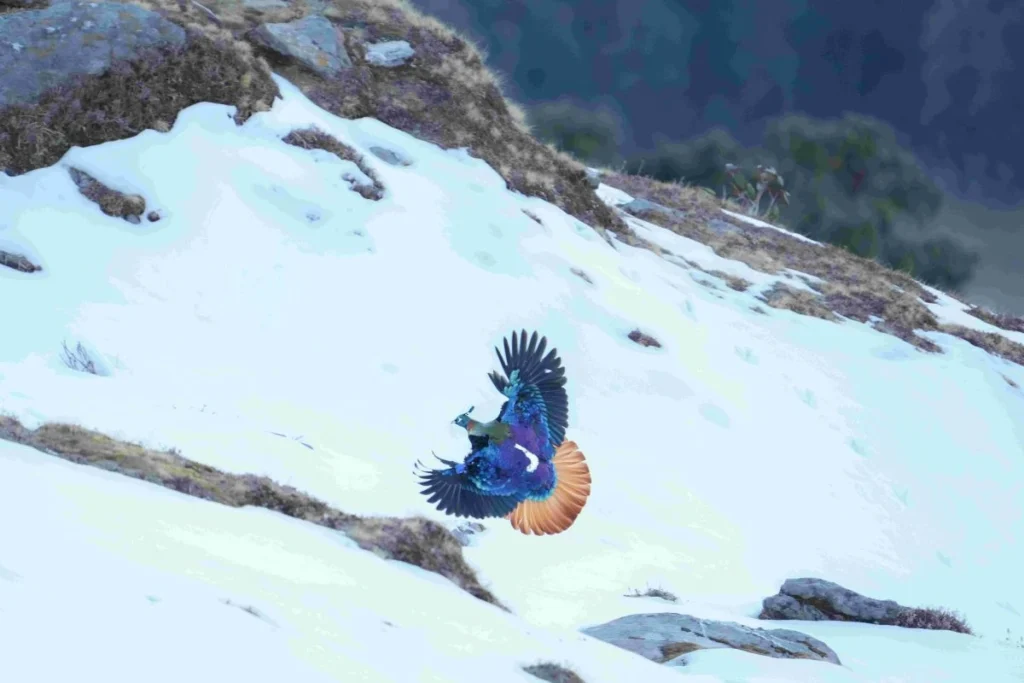
Photographing wild birds requires a balance of mechanical precision, optical discipline, and an understanding of animal behavior. Unlike static landscape subjects or cooperative portrait models, birds are small, rapid, and easily disturbed. A fraction of a second often separates a sharp eye reflection from an unusable, motion-blurred frame.
┌─────────────────────────────┐
│ Avian Subject State │
└──────────────┬──────────────┘
│
┌────────────────────────┴────────────────────────┐
▼ ▼
┌─────────────────────────┐ ┌─────────────────────────┐
│ Perched / Stationary │ │ In Active Motion │
└────────────┬────────────┘ └────────────┬────────────┘
│ │
┌──────────┴──────────┐ ┌───────────┴───────────┐
▼ ▼ ▼ ▼
Perched Songbird Ground Forager Linear Flight High Velocity
(1/500s min) (1/800s min) (1/2000s–1/3200s) (1/4000s min)
│ │ │ │
[Single-Point AF] [Single-Point AF] [Wide-Zone AF] [Wide-Zone AF]
Modern digital cameras provide tools that previous generations of naturalists did not have, including machine-learning subject-tracking algorithms and high-ISO sensors capable of capturing clean detail under dense forest canopies. However, technology cannot compensate for incorrect shutter speeds, improper focus point placement, or flawed exposure logic. Mastering the foundational mechanics ensures that when rare field opportunities arise, your equipment functions as an extension of your field vision.
Quick Reference: Exposure and Autofocus Baselines
The table below outlines verified baseline settings across four primary field scenarios:
Table 1: Camera Settings by Avian Behavior and Flight Speed
| Subject Behavior | Minimum Shutter Speed | Optimal Aperture | Baseline ISO Strategy | Recommended AF Area |
| Perched / Stationary (Parrots, Owls, Finches) | 1/500s – 1/640s | f/4 – f/5.6 | ISO 1600–3200 or Auto ISO | Single-point AF on eye |
| Linear Flight (Eagles, Storks, Waterfowl) | 1/2000s – 1/3200s | f/4 – f/5.6 | Auto ISO (up to ISO 6400+) | Wide-zone tracking / Dynamic area |
| Erratic High-Speed Flight (Swifts, Swallows) | 1/2500s – 1/4000s | f/4 – f/5.6 | Auto ISO (up to ISO 6400+) | Expanded zone / 3D tracking |
| High-Velocity Action (Kingfishers Diving) | 1/4000s minimum | f/4 – f/5.6 | Auto ISO (up to ISO 6400+) | Wide area continuous AF |
Best Camera Settings for Bird Photography by Scenario
Different avian behaviors demand specific exposure profiles. Applying a static camera setting across an entire safari or field walk results in missed action or unnecessary noise.
Perched and Stationary Birds (1/500s–1/640s)
Stationary birds allow for lower shutter speeds, which keeps your ISO lower and dynamic range higher. However, even a resting bird exhibits rapid head twitches and micro-movements that can introduce motion blur at standard handheld speeds.
- Shutter Speed: Set a baseline of 1/500s to 1/640s. If working with long super-telephoto lenses (such as 500mm or 600mm), avoid dropping below 1/500s even when the bird appears motionless.
- Aperture: Shoot between f/4 and f/5.6. This isolates the subject against foliage while keeping the entire bill and eye within the plane of acceptable focus.
- ISO: In dense, shadowed canopy environments, allow your ISO to reach 1600 to 3200 to maintain the necessary 1/500s floor.
- Focus Configuration: Use a precise single autofocus point placed directly on the bird’s eye.
Field Note: For ground-foraging birds like cranes, owls, or bustards that are walking slowly through grassland, increase your baseline shutter speed slightly to 1/800s to counteract leg motion while keeping single-point continuous tracking active.
General Birds in Flight (1/2000s–1/4000s)
Large and medium-sized birds—including raptors, egrets, pelicans, and ducks—move across the sky with powerful wingbeats. Freezing the primary flight feathers at the apex of a wing downstroke requires substantially faster shutter actuation.
- Shutter Speed: 1/2000s is the absolute entry point for linear flight. For rapid wing beats or fast flybys against open sky, increase to 1/3200s.
- Aperture: Keep the lens wide open or stopped down by half a stop (f/4 to f/5.6). Closing down further reduces shutter speed or forces ISO higher than necessary.
- ISO: Engage Auto ISO with high limits (ISO 6400+). Fast shutter speeds demand sensor amplification, and freezing the motion sharply takes precedence over a grain-free image.
Small, High-Speed Flyers: Swifts and Swallows (1/2500s–1/4000s)
Small passerines, swifts, and hirundines represent one of the most demanding technical scenarios in wildlife photography. Their flight paths are erratic, and their wingbeat frequency is exceptionally high.
- Shutter Speed: Begin at 1/2500s for general gliding passes, and elevate to 1/3200s or 1/4000s for active, erratic flight.
- Autofocus Strategy: A single AF point is virtually impossible to keep on a rapid, dipping bird. Use an expanded cluster or wide-area tracking mode that utilizes surrounding focus assist points.
High-Velocity Action: Kingfishers Diving (1/4000s Minimum)
A kingfisher striking water from an elevated perch represents a peak dynamic event. The entry, water impact, and exit happen in milliseconds.
- Shutter Speed: 1/4000s is the mandatory minimum. Using 1/2000s in this scenario will yield a blurred bill, soft water droplets, and blurred wingtips.
- Exposure Balance: Open the lens aperture to its maximum transmission value (f/4 or f/5.6) and allow Auto ISO to compensate for the rapid light loss caused by the fast shutter.
Exposure Fundamentals: Shutter Speed, Aperture, and ISO Management
[ SHUTTER SPEED ]
Priority 1: Freeze Subject Motion
(1/500s to 1/4000s)
▲
/ \
/ \
/ \
/ \
/ \
[ APERTURE ] ◄─── ───► [ AUTO ISO ]
Priority 2: Depth / Isolation Priority 3: Exposure Balance
(f/4 to f/5.6) (100 to 6400+)
Balancing the exposure triangle in bird photography differs fundamentally from landscape or portrait work. Shutter speed is the primary operational parameter; aperture and ISO serve to support the necessary shutter speed.
Shutter Speed: Traditional vs. The Modern Double Focal Length Rule
The classic handholding rule in 35mm photography states that shutter speed should equal 1 divided by the focal length (for example, 1/500s on a 500mm lens). While this baseline mitigates camera shake on stationary subjects, it does not reliably prevent motion blur on high-resolution modern sensors.
Table 2: Shutter Speed Baseline Comparison
| Lens Focal Length | Traditional Rule (1/Focal Length) | Modern Double Focal Length Rule (2×) | Field Application |
| 300mm | 1/300s (Baseline shake prevention) | 1/600s (Recommended floor) | Perched passerines, large waders |
| 400mm | 1/400s (Baseline shake prevention) | 1/800s (Recommended floor) | Slow-moving ground birds, foraging |
| 500mm | 1/500s (Baseline shake prevention) | 1/1000s (Recommended floor) | Active perching, pre-flight tension |
| 600mm | 1/600s (Baseline shake prevention) | 1/1200s – 1/1250s (Recommended floor) | Telephoto baseline, general action |
The modern rule mandates setting a minimum shutter speed of at least double the focal length (e.g., 300mm = 1/600s minimum; 600mm = 1/1200s–1/1250s). This conservative margin compensates for angular micro-vibrations, subject twitches, and high-pixel-density sensors that reveal motion blur more readily.
Traditional Rule (1/FL): 500mm Lens ──► 1/500s [Marginal on high-res sensors]
Modern 2× Rule (2/FL): 500mm Lens ──► 1/1000s [Sharpness safety margin]
Action/Flight Baseline: Any Tele ──► 1/2000s+ [Freezes subject wingbeat]
Aperture Selection: Balancing Depth of Field and Sharpness
Many photographers assume that shooting at f/2.8 is ideal because it gathers more light. However, in field practice, super-telephoto lenses at f/2.8 produce an extremely razor-thin depth of field. At close distances, this can leave the bird’s eye sharp while the bill tip or primary feathers fall completely out of focus.
- The f/4 to f/5.6 Sweet Spot: Setting an aperture of f/4 to f/5.6 strikes the ideal optical balance. It provides sufficient depth of field to render the bird’s entire head sharp while keeping the background softly blurred.
- Lens Sweet Spot: Most telephoto zoom lenses deliver maximum optical resolving power when stopped down 1 to 2 stops from their widest aperture (e.g., using f/5.6 or f/6.3 on an f/4 or f/5.6 native lens).
Depth of Field Illustration:
f/2.8: [ Bill (Soft) ] ─── [ Eye (Sharp) ] ─── [ Flank (Soft) ] <– Too shallow
f/5.6: [ Bill (Sharp) ] ─── [ Eye (Sharp) ] ─── [ Flank (Sharp) ] <– Optimal balance
Shooting Mode & ISO Strategy: Auto ISO with Minimum Shutter Limits
Operating in purely automatic mode produces unpredictable shutter choices that ruin action shots. Conversely, working in fully manual mode with fixed ISO values often causes severe underexposure when birds fly from bright open sky into deep shade.
- The Preferred Workflow: Shoot in Manual Mode with Auto ISO.
- The Logic: You lock in the required Shutter Speed (e.g., 1/2500s) to freeze movement and dial in the desired Aperture (e.g., f/5.6) for depth of field. The camera instantly manages the exposure by adjusting the ISO value across dynamic lighting conditions.
- Overcoming Noise Phobia: Modern sensors perform well at high ISO levels. Modern raw-processing software with AI-assisted noise reduction handles ISO 6400 and higher cleanly. A sharp image with luminance noise can be corrected; an image with motion blur cannot.
Mastering Autofocus and Bird Eye Detection
Autofocus performance determines whether high-speed avian encounters result in clean files or missed focus.
┌───────────────────────────────┐
│ Choose Autofocus Strategy │
└───────────────┬───────────────┘
│
┌─────────────────┴─────────────────┐
▼ ▼
┌─────────────────────────┐ ┌─────────────────────────┐
│ Stationary or Perched │ │ Active Flight Tracking │
└────────────┬────────────┘ └────────────┬────────────┘
│ │
▼ ▼
• Continuous AF (AF-C / AI Servo) • Continuous AF (AF-C / AI Servo)
• Single Point AF (Eye placement) • Wide / Dynamic Tracking Zone
• Bird Eye Detection AF: ON • Bird Eye Detection AF: ON
Single Point vs. Wide Area Tracking in AI Servo / AF-C
Never use single-shot autofocus (AF-S / One-Shot) for bird photography. Birds shift their weight constantly, meaning the distance between lens and subject changes continuously.
- Focus Mode: Set the camera permanently to Continuous Autofocus (AF-C for Nikon/Sony/OM SYSTEM; AI Servo for Canon).
- Single Point for Static Birds: When a bird is framed within branches, reed beds, or dense foliage, switch to a precise single focus point. Large focus zones will frequently latch onto high-contrast twigs in the foreground instead of the bird.
- Wide-Zone / Dynamic Area for Flight: Against open skies or clean water backdrops, select a wide-area or dynamic expanded focus zone. This allows the camera’s tracking engine to follow the bird smoothly across the frame even when handholding motion is uneven.
Leveraging Modern Bird Eye Detection AF
Modern camera systems—including the Canon EOS R5/R3, Nikon Z9/Z8, Sony A1/A7 IV, and OM SYSTEM OM-1 Mark II—incorporate dedicated deep-learning algorithms trained on avian morphology.
- Accuracy: These systems provide up to 99% acquisition accuracy on visible avian eyes, even through complex background patterns.
- Operational Rule: Keep Bird Eye Detection AF enabled for all encounters. If the bird turns its head away, the system defaults smoothly to head tracking, then torso tracking, and re-engages the eye the instant it faces the camera again.
Expert Tip: When photographing dark-plumaged birds (such as drongos, cormorants, or black storks) in bright lighting, meter using Evaluative/Matrix metering with a -0.3 to -0.7 exposure compensation offset to preserve highlight detail in ambient water or sky while retaining focus contrast on the eye.
Equipment Selection & Field Timing
Bird Photography Gear: Lenses and Camera Systems
Wild birds are inherently distant and easily startled subjects. Therefore, your choice of optical equipment dictates your field capabilities more than the camera body itself. While a standard kit lens may suffice for landscape work, bird photography requires dedicated telephoto reach to achieve detailed, frame-filling images without causing the subject to flush.
Table 3: Bird Photography Lenses Comparison — Reach, Application & Cost
| Lens Category | Example Focal Lengths | Best For | Estimated Price Range |
| Minimum Baseline | 300mm | Backyard birds, accessible urban parks | Under $1,000 |
| Versatile Zoom | 150–600mm | Mixed scenarios, general bird photography | $1,000–$2,000 |
| Professional Prime | 400mm f/2.8, 500mm f/4, 600mm f/4 | Low light, distant subjects, extreme sharpness | $6,000–$14,000 |
| Integrated Pro Zoom | 150–400mm f/4.5 (with 1.25x TC) | Premium versatility, hand-held stability | $7,000–$9,000 |
The Baseline: 300mm Telephoto Lenses
A 300mm focal length represents the absolute minimum entry point for bird photography.
- It is adequate for photographing cooperative birds at backyard feeders or within accessible urban parks.
- It quickly becomes restrictive when photographing small, distant species or fast-moving action.
- If you are currently shooting with a standard 70–300mm lens, you will likely need to crop your images heavily, which degrades overall resolution.
The Versatile Workhorse: 150–600mm Zoom Lenses
For the vast majority of enthusiasts, a 150–600mm zoom provides the most practical balance of cost, weight, and utility.
- These lenses cost between $1,000 and $2,000, making them highly accessible.
- They allow photographers to zoom out to locate a flying bird in the viewfinder, before zooming in to 600mm for the final shot.
- While they are slightly less sharp at their maximum extension compared to fixed primes, the ability to adapt to varying subject distances makes them highly effective in unpredictable field conditions.
Professional Super-Telephotos: 400mm f/2.8, 500mm f/4, and 600mm f/4
Fixed focal length prime lenses are the standard for professional wildlife photographers.
- These lenses deliver superior optical sharpness and feature fast maximum apertures.
- A fast aperture allows more light to reach the sensor, enabling faster shutter speeds in dim forest environments.
- The trade-offs are significant: they weigh considerably more, restrict compositional flexibility, and carry price tags ranging from $6,000 to $14,000.
Integrated Teleconverters: 150–400mm f/4.5 PRO
Recent advancements have introduced premium zoom lenses with integrated teleconverters, such as the OM SYSTEM M.Zuiko 150–400mm f/4.5 TC 1.25x IS PRO.
- This lens provides a constant f/4.5 aperture and features a physical lever that drops a 1.25x teleconverter into the optical path instantly.
- It features a 5-stop image stabilization system.
- This design allows professionals to switch between a standard telephoto range and extreme reach without exposing the camera sensor to dust.
Secondary Lenses & Dual-Body Field Configurations
Switching lenses in a dusty safari vehicle or a humid forest often results in sensor contamination and missed opportunities. Serious practitioners utilize a two-camera setup:
- Primary Body: Mounted with a long prime for distant subjects.
- Secondary Body: Mounted with a shorter zoom, such as a 70–200mm or 100–400mm.
- This secondary combination is used for environmental portraits, wide habitat shots, or situations where a large bird flies too close for the primary lens.
Decision Guide: Upgrading Your Camera Body
If you are considering an upgrade, prioritize modern autofocus capabilities over raw megapixel count.
- Beginner: Canon EOS Rebel, Nikon D3500, or Sony A6000 paired with a 150–600mm lens.
- Intermediate: Canon EOS R7, Nikon Z6, or Sony A7 III.
- Advanced: Canon R5, Nikon Z9, Sony A1, or OM SYSTEM OM-1 Mark II—bodies that feature 99% accurate bird eye detection algorithms.
Smartphone Bird Photography: Hardware Capabilities and Constraints
High-end modern smartphones—such as the iPhone 15 Pro and Samsung S24 Ultra—now incorporate 3x to 5x optical telephoto lenses, providing a field of view roughly equivalent to a 300mm DSLR lens. While viable for casual use at accessible sanctuaries, they operate under strict physical limitations.
Table 4: Dedicated Camera Systems vs. Smartphone Telephotos
| Feature | Dedicated Camera (DSLR/Mirrorless) | Modern Smartphone |
| Optical Reach | 300mm to 600mm+ true optical magnification | 300mm digital equivalent maximum |
| Low-Light Capability | Clean files at ISO 6400+ | High noise levels and muddy details |
| Exposure Control | Native Aperture Priority and Manual ISO | Requires Manual Mode adjustment |
| Flash Application | Disabled (useless for distant wildlife) | Disabled (useless and disrupts behavior) |
| Stability | Internal Lens/Sensor Stabilization | Tripod strongly recommended to prevent blur |
- Smartphone Photography Tip: Before shooting, wipe your phone lens with a microfiber cloth. Fingerprint smudges will severely degrade contrast and sharpness when shooting at maximum digital zoom.
Best Time to Photograph Birds: Light Quality and Avian Activity
Light dictates the quality of a photograph, but in wildlife photography, it also dictates animal behavior. Following the same principles as landscape photography, the most aesthetically pleasing images are captured during the golden hours.
Morning Golden Hour (6:00–9:00 AM): Feeding Cycles and Low-Angle Light
The hours immediately following sunrise offer the highest probability of success.
- The light strikes subjects at a low angle, providing a warm, golden cast that prevents harsh shadows under the bird’s wings or chin.
- From a behavioral standpoint, birds are highly active during this window.
- After roosting through the night, they spend the early morning actively foraging, hunting, and re-establishing territory.
- If you wish to photograph birds in active flight or capturing prey, schedule your field sessions to coincide precisely with sunrise.
Late Afternoon (4:00–6:00 PM): Water Activity and Evening Roosting
The late afternoon provides a secondary window of premium photographic conditions.
- As the sun lowers, the light softens and regains its warm tones.
- During this period, many bird species travel to local water sources to drink and bathe before nightfall.
- Setting up a hide near a wetland or waterhole between 4:00 PM and 6:00 PM yields excellent opportunities for capturing dynamic splashing behaviors and flight sequences as birds return to their roosts.
Field Note: Managing the Low Light Challenge Golden hour light is beautiful, but it is inherently dim—especially when shooting under a dense forest canopy.
- Do not compromise your shutter speed to keep your ISO low.
- Open your aperture wide (f/4 to f/5.6), maintain the shutter speed required to freeze motion, and allow the camera to select a high ISO (even 6400 or above).
- Modern post-processing software can successfully remove digital noise from a sharp image, but no software can fix motion blur caused by a slow shutter speed.
Fieldcraft, Composition & Action Techniques
┌──────────────────────────────────────┐
│ Field Composition Architecture │
└──────────────────┬───────────────────┘
│
┌────────────────────┬────────────┴───────────┬────────────────────┐
▼ ▼ ▼ ▼
[ Eye-Level Angle ] [ Eye-Sharp Focus ] [ Directional Space ] [ Layered Depth ]
• Intimate view • Focus on near eye • Lead room for flight • Soft foreground
• Clean separation • Critical sharpness • Dynamic narrative • Clean background
Field Composition and Framing Principles
Technical accuracy with shutter speed and autofocus ensures an image is sharp, but thoughtful composition turns a standard record shot into an engaging wildlife portrait. Applying disciplined framing rules in the field establishes visual hierarchy and draws the viewer’s attention directly to the subject.
Eye-Level Perspective: Creating Connection and Intimacy
Photographing birds from a standing height looking down is one of the most common compositional mistakes. High-angle shots compress the subject against cluttered ground, resulting in a flat, detached perspective.
- Drop to Subject Height: Lower your shooting position so the lens axis aligns directly with the bird’s eye line.
- Ground and Water Subjects: When working with waders, shorebirds, or ground foragers, sit or lie prone on the ground.
- Optical Separation: Shooting at eye level pushes the background further behind the subject, allowing wide apertures to dissolve distant foliage into soft blur.
High-Angle (Standing): [Camera] ──► \ (Looking down) ──► [Bird on Mud] ──► Flat / Distant
Eye-Level (Prone): [Camera] ────► [Bird at Eye Level] ───────► Distant Background Blur
Focus Priority: Why the Eye Decides Image Success
In wildlife portraiture, viewer engagement depends on the sharpness of the bird’s eye.
- The Focal Priority: The eye and surrounding facial plumage must be rendered with pinpoint sharpness. If the primary wing feathers or tail are sharp but the eye is soft, the entire frame fails.
- Placement: When using single-point continuous autofocus, always place the active focus point directly over the eye closest to the camera.
- Catchlight: Ensure ambient light reflects off the cornea to create a bright catchlight, giving the subject life and dimension.
Negative Space: Leaving Room for Flight Direction
Centering a moving subject creates a static, unbalanced composition. A flying or foraging bird requires visual space within the frame to travel into.
- The Lead-Room Rule: Position the bird off-center, allocating two-thirds of the frame to the area directly ahead of its beak or flight path.
- Visual Direction: Providing negative space in the direction of travel creates a sense of forward momentum, speed, and narrative tension.
Incorrect (Blocked): | [Bird Flying Right ──►] | <– Feels constrained
Correct (Directional): | [Bird ──►] | <– Natural lead room
Managing Backgrounds: Eliminating Visual Clutter and Man-Made Artifacts
A distracting background pulls the viewer’s attention away from the bird.
- Micro-Adjustments in Position: If bright highlights, high-contrast twigs, or branches run behind the bird’s head, shift your physical position slightly to the left, right, up, or down to align the subject with clean foliage.
- Exclusion of Artificial Elements: Avoid including fences, concrete structures, electrical wires, or vehicles in your frame. These man-made elements look unnatural and distract from the wild environment.
Incorporating Environmental Foreground for Depth
Compositions that feature only a subject against a flat background can feel clinical. Applying landscape principles adds depth to avian images.
- Soft Foreground Framing: Shoot low through blades of grass, out-of-focus leaves, or surface water between the lens and the subject.
- Three-Dimensional Context: Using out-of-focus foreground elements creates a natural three-dimensional frame that draws the eye directly into the sharp focal plane.
Photographing Birds in Flight (BIF)
┌────────────────────────────┐
│ Flight Action Setup │
└─────────────┬──────────────┘
│
┌───────────────────────┴───────────────────────┐
▼ ▼
┌───────────────────────────┐ ┌───────────────────────────┐
│ Camera Parameters │ │ Physical Execution │
└────────────┬──────────────┘ └────────────┬──────────────┘
│ │
• Shutter: 1/2000s – 1/4000s • Pivot smoothly from hips
• Aperture: f/4 – f/5.6 • Keep subject inside AF zone
• AF: Continuous + Wide Zone • Fire in controlled bursts
Capturing sharp images of fast-moving birds requires a combination of equipment configuration and physical tracking discipline.
Tracking Mechanics and Panning Discipline
Smooth tracking is essential when swinging heavy telephoto lenses through the air.
- Stance and Pivot: Stand with your feet shoulder-width apart, perpendicular to the bird’s flight line. Rotate smoothly from your waist and hips rather than steering solely with your arms.
- Autofocus Tracking: Engage Continuous Autofocus (AF-C / AI Servo) using a wide-area focus zone or 3D dynamic tracking.
- Burst Management: Acquire focus well before the subject enters your optimal framing distance. Fire short, controlled bursts rather than holding down the shutter continuously, which can cause the camera buffer to lock up.
Predicting Flight Paths and Takeoff Behaviors
Anticipating avian behavior gives you the fractions of a second needed to capture takeoff and flight sequences.
- Wind Direction: Birds almost always take off and land facing directly into the wind to generate aerodynamic lift. Position yourself with the wind at your back to capture incoming head-on flight paths.
- Pre-Takeoff Indicators: Watch for physical cues such as crouched postures, head bobbing, tail twitching, or defecation, which frequently precede takeoff.
- Perch Departure: Once pre-takeoff cues appear, lock focus onto the bird’s head and begin shooting the moment the feet leave the branch.
Ethical Fieldcraft and Stalking Techniques
Field patience and respectful animal handling produce better behavioral images than aggressive pursuit. Chasing birds causes stress and results in photographs of retreating animals.
┌──────────────────────────────────────┐
│ The Pause-and-Advance Sequence │
└──────────────────┬───────────────────┘
│
▼
[ Step 1: Identify Subject ]
Take baseline record shot
│
▼
[ Step 2: Advance Slowly ]
No direct eye contact or rush
│
▼
[ Step 3: Pause & Stand Still ]
Allow bird to resume feeding
│
▼
[ Step 4: Capture Frames ]
Gradually decrease distance
The Pause-and-Advance Approach
Approaching a bird requires moving slowly and deliberately.
- Move Gradually: Walk at an angle toward the subject rather than advancing in a direct, predatory line.
- The Pause Routine: Take a few slow paces, stop, and take a baseline photograph. Wait until the bird returns to feeding, preening, or singing before moving closer.
- Quiet Movement: Avoid sudden movements, fast gear adjustments, or loud conversations.
Reading Stress Signals and Preserving Natural Behavior
True fieldcraft prioritizes natural animal behavior over an adrenaline-fueled shot.
- Signs of Alarm: If a bird ceases foraging, stands rigidly upright, issues sharp alarm vocalizations, or nervously flicks its tail, you have entered its personal flight zone.
- Backing Off: Slowly step back and lower your profile. The goal is to document natural feeding, territorial displays, and parental care without causing the animal to flush.
Prohibitions on Flash and Habitat Disturbance
Responsible fieldcraft protects both the bird and the surrounding habitat.
- No Artificial Flash: Flash units are ineffective over long telephoto distances and can temporarily disorient wild birds. Turn flash units off completely.
- Protecting Nesting Sites: Never approach or alter active nesting sites to obtain an unobstructed view. Exposing nests removes camouflage and leaves eggs or chicks vulnerable to predators.
- No Baiting or Playback: Avoid using artificial food or excessive acoustic call playback, which disrupts normal foraging cycles and territorial energy reserves.
Responsible Tourism Tip: When photographing on birding trails or boat safaris, remain on designated paths and maintain a quiet environment. Quality bird photography relies on patience and timing, not intrusive pursuit.
India Destinations, Post-Processing, Common Mistakes & FAQs
Top 8 Bird Photography Locations in India
India supports over 1,300 recorded avian species across varied geographic zones, from high-altitude Himalayan passes to tropical rainforests and shallow saline wetlands. Choosing a location with high avian density and reliable access significantly increases your chances of encountering diverse subjects.
┌─────────────────────────────┐
│ Indian Avian Habitats Map │
└──────────────┬──────────────┘
│
┌─────────────────────┬─────────────┴─────────────┬─────────────────────┐
▼ ▼ ▼ ▼
┌──────────────────┐ ┌──────────────────┐ ┌──────────────────┐ ┌──────────────────┐
│ Himalayan & East │ │ Tropical Forests │ │ Saline Wetlands │ │ River Systems │
├──────────────────┤ ├──────────────────┤ ├──────────────────┤ ├──────────────────┤
│ • Singalila │ │ • Western Ghats │ │ • Keoladeo │ │ • Ranganthittu │
│ • Eaglenest │ │ (Endemics) │ │ • Nalsarovar │ │ (Boat-based) │
│ • High-Altitude │ │ │ │ • Little Rann │ │ │
└──────────────────┘ └──────────────────┘ └──────────────────┘ └──────────────────┘
Table 5: Top 8 Indian Birding Hotspots — Species Diversity, Target Avifauna & Peak Seasons
| Sanctuary / National Park | State | Species Count | Primary Avian Targets | Optimal Field Season |
| Keoladeo National Park (Bharatpur) | Rajasthan | 300+ species | Migratory waterfowl, storks, cranes, raptors | November to February |
| Ranganthittu Bird Sanctuary | Karnataka | 200+ species | Riverine nesting colonies, storks, spoonbills, terns | Year-round (Winter peak) |
| Western Ghats | Kerala / Tamil Nadu | 400+ species | Endemic rainforest passerines, hornbills, flycatchers | October to February |
| Eaglenest Wildlife Sanctuary | Assam | High (Rare targets) | Himalayan pheasants, babblers, tragopans | March to November |
| Nalsarovar Bird Sanctuary | Gujarat | 200+ species | Greater and Lesser Flamingos, pelicans, waders | November to February |
| Little Rann of Kutch | Gujarat | 150+ species | Desert coursers, bustards, larks, winter raptors | November to February |
| Singalila National Park | West Bengal | 150+ species | High-altitude laughingthrushes, finches, raptors | March to November |
| Himalayan High-Altitude Hotspots | Multiple States | High (Endemics) | Snowcocks, monals, high-elevation specialists | March to November |
Keoladeo National Park, Bharatpur (Rajasthan)
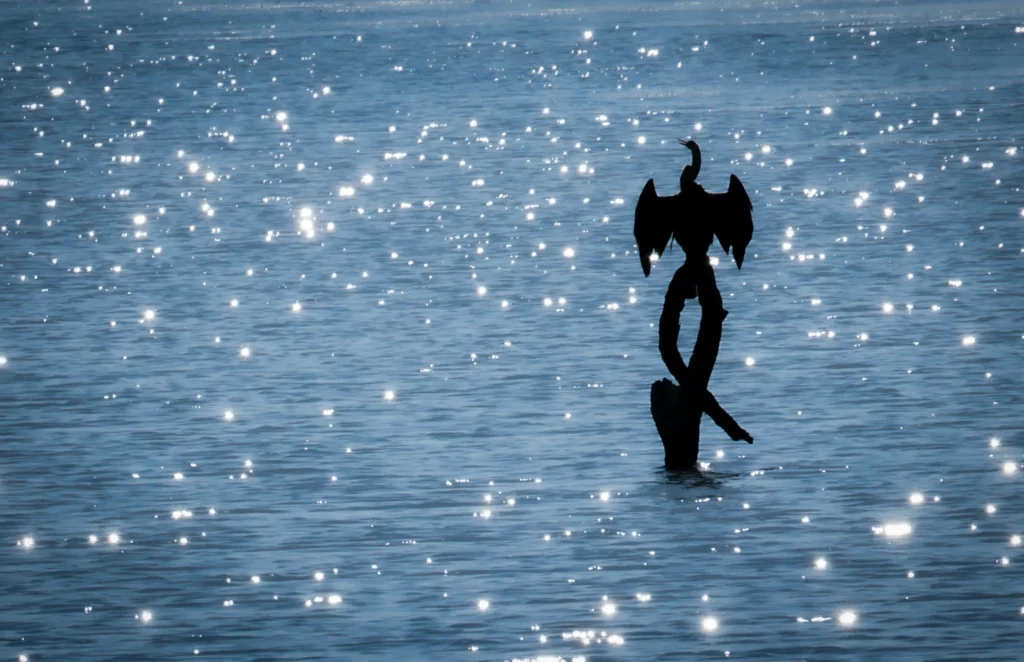
- Species Count: Over 300 recorded species.
- Field Dynamics: A premier wetland habitat that attracts thousands of migratory waterfowl each winter.
- Accessibility: Paved pathways allow photographers to explore by foot, bicycle, or cycle rickshaw, providing stable platforms for eye-level waterfowl photography along shallow marshes.
Ranganthittu Bird Sanctuary (Karnataka)
- Species Count: Over 200 recorded species.
- Field Dynamics: An island-based sanctuary on the Cauvery River.
- Photography Style: Guided rowboat excursions place photographers low to the water surface, offering clean perspectives on breeding colonies of painted storks, spoonbills, and darters nesting on rocky outcrops.
Western Ghats (Kerala & Tamil Nadu)
- Species Count: Over 400 recorded species.
- Field Dynamics: A biodiversity hotspot characterized by dense tropical evergreen forests and high endemism.
- Technical Considerations: Dark canopy conditions require wide apertures (f/4), high ISO values (3200–6400+), and precise single-point autofocus to acquire small passerines among thick leaves.
Eaglenest Wildlife Sanctuary (Assam)
- Species Count: Renowned for rare and localized montane species.
- Field Dynamics: Spans diverse subtropical and temperate altitudinal belts, making it a critical habitat for specialized Himalayan babblers, pheasants, and laughingthrushes.
Nalsarovar Bird Sanctuary (Gujarat)
- Species Count: Over 200 recorded species.
- Field Dynamics: A vast, shallow desert wetland that hosts massive congregations of feeding flamingos, pelicans, and wintering shorebirds. Flat water horizons offer unobstructed backgrounds for flight shots.
Little Rann of Kutch (Gujarat)
- Species Count: Over 150 recorded species.
- Field Dynamics: A unique saline desert wetland ecosystem. Photographers can work from open safari vehicles to capture ground-dwelling species, desert larks, and wintering birds of prey resting on flat ground.
Singalila National Park (West Bengal)
- Species Count: Over 150 recorded species.
- Field Dynamics: Situated along a high-elevation ridge line, Singalila combines trekking routes with mountain birding, offering clean perspectives on high-altitude avian fauna against montane vegetation.
High-Altitude Himalayan Hotspots
- Species Count: High concentration of specialized, cold-climate endemics.
- Field Dynamics: High-elevation zones across northern India provide opportunities to photograph Himalayan monals, snowcocks, and specialized raptors amidst steep topography.
Post-Processing Workflow and RAW Management
Editing bird photographs should focus on recovering sensor detail, balancing highlight and shadow areas, and eliminating digital noise while preserving plumage texture.
┌──────────────────────────────────────┐
│ Avian RAW Processing Pipeline │
└──────────────────┬───────────────────┘
│
▼
[ 1. RAW File Import ]
Preserve 14-bit tonal data
│
▼
[ 2. Exposure & Balance ]
Recover sky highlights; lift shadows
│
▼
[ 3. AI Denoise Routine ]
Clean ISO 6400+ luminance noise
│
▼
[ 4. Feather & Eye Sharpening ]
Apply local clarity directly to iris
Table 6: Post-Processing Software & Utility Matrix
| Application | Platform / Pricing | Primary Field Utility | Key Features |
| Adobe Lightroom Mobile / Desktop | Paid / Subscription | Professional RAW management | Advanced highlight recovery, color grading, AI Denoise |
| Topaz Denoise AI | Paid / One-Time | Specialized noise suppression | AI-driven edge preservation and detail reconstruction |
| Snapseed | Free | Rapid mobile adjustments | Straightforward tonal curves, selective exposure, quick filters |
| Photoshop Express | Free / In-App Purchases | Mobile layers and adjustments | Layer-based fine adjustments, localized sharpening |
RAW vs. JPEG Fine: Maximizing Dynamic Range
- RAW Format: Always capture bird images in uncompressed or lossless RAW format. RAW files retain all 14-bit sensor data, allowing you to recover blown highlight details in white plumage or lift dark shadow areas on shaded underwings.
- JPEG Limitations: JPEG files compress and discard tonal data in-camera. Use JPEG Fine only if you do not plan to edit your images.
Color Balance, Shadow Recovery, and AI Denoise at ISO 6400+
- White Balance & Color Neutrality: Adjust temperature and tint so plumage colors match real-world field field guides. Avoid over-saturating greens and blues, which can introduce chromatic artifacts.
- Dynamic Range Adjustments: Pull back Highlights (-30 to -60) to recover feather details on bright crowns or wings. Lift Shadows (+20 to +40) to reveal underwing plumage.
- AI Denoise Processing: With modern machine-learning denoise tools in Adobe Lightroom or Topaz Denoise AI, high-ISO images captured at ISO 6400+ can be cleaned thoroughly. These algorithms differentiate between unwanted grain and fine feather barbules, preserving sharp subject edges while smoothing out background noise.
- Selective Sharpening: Apply sharpening masks specifically to the head, bill, and eye region. Avoid applying global sharpening across the entire frame, which can introduce artifacts into softly blurred backgrounds.
10 Common Bird Photography Mistakes to Avoid
┌─────────────────────────────┐
│ Critical Field Failures │
└──────────────┬──────────────┘
│
┌─────────────────────┬──────────────┴──────────────┬─────────────────────┐
▼ ▼ ▼ ▼
┌──────────────────┐ ┌──────────────────┐ ┌──────────────────┐ ┌──────────────────┐
│ Exposure Errors │ │ Composition Flaws│ │ Fieldcraft Flaws │ │ Technical Errors │
├──────────────────┤ ├──────────────────┤ ├──────────────────┤ ├──────────────────┤
│ • Slow Shutter │ │ • High Angle │ │ • Rushing Birds │ │ • Body AF Focus │
│ • Fearing ISO │ │ • Clutter / Wires│ │ • Firing Flash │ │ • No Lead Space │
│ │ │ • Burst Overuse │ │ • Wrong Location │ │ │
└──────────────────┘ └──────────────────┘ └──────────────────┘ └──────────────────┘
- Using Insufficient Shutter Speeds for In-Flight Birds: Setting 1/500s for a flying raptor or wader produces wing and head blur. Maintain a minimum of 1/2000s for standard flight and up to 1/4000s for high-speed species.
- Focusing on the Bird’s Torso Instead of the Eye: Placing the focus point on the breast or wing leaves the eye soft. A bird photograph fails if the near eye is out of focus.
- Shooting from a High Angle: Photographing ground foragers while standing compresses them against distracting dirt. Drop down to eye level to create clean separation and depth.
- Ignoring Background Clutter and Man-Made Artifacts: Composing images with visible fences, power lines, or bright branches behind the subject distracts from the bird. Shift your position to achieve a clean, natural background.
- Centering Flying Birds Without Lead Room: Placing a bird in the center of the frame restricts visual movement. Leave two-thirds of the frame open ahead of the bird to indicate direction.
- Firing an On-Camera Flash: Flash lacks the reach for distant telephoto work and can disrupt wild birds. Keep flash units turned off.
- Prioritizing Quantity Over Intentional Timing: Firing hundreds of random frames without observing behavior fills memory buffers and results in identical, poorly timed shots. Observe behavior and wait for distinct actions.
- Rushing Directly Toward the Subject: Walking quickly toward a bird triggers its flight response. Use the pause-and-advance technique, moving slowly at an angle.
- Fearing High ISO Values in Dark Environments: Forcing an ISO of 100–400 in dense shade drops the shutter speed to blurry levels. Allow Auto ISO to reach 3200–6400+ to guarantee a sharp frame.
- Selecting Sanctuaries Without Seasonal Research: Arriving at seasonal wetlands outside peak migration months leads to low species counts. Align your visits with specific regional migration and breeding cycles.
Frequently Asked Questions
1. What are the best baseline camera settings for bird photography?
For perched birds, use a shutter speed of 1/500s–1/640s, an aperture of f/4–f/5.6, and Auto ISO. For flying birds, increase the shutter speed to 1/2000s–1/4000s with wide-area continuous autofocus.
2. What shutter speed should I use for birds in flight?
Maintain a baseline of 1/2000s for large birds. For small, erratic fliers like swifts or swallows, use 1/2500s–1/4000s. Kingfishers diving into water require a minimum of 1/4000s.
3. What is the minimum lens focal length needed for bird photography?
A 300mm lens is the functional minimum. For general field conditions, a 150–600mm zoom or a 400mm–600mm telephoto prime provides the necessary reach without severe cropping.
4. How do I get sharp flight shots of erratic fliers like swifts and swallows?
Set your shutter speed to 1/3200s or 1/4000s, use Continuous AF (AF-C / AI Servo) with wide-area dynamic tracking, open the aperture to f/4–f/5.6, and track the bird smoothly by pivoting from your hips.
5. Where should I place the focus point on a bird?
Place the focus point directly on the eye closest to the camera. If the eye is sharp, soft plumage on the tail or outer wing is acceptable.
6. How do I get eye-level with ground birds?
Drop your physical position by sitting, kneeling, or lying prone with your lens mounted on a ground pod or low tripod. This aligns the lens with the bird’s eye line and creates smooth background blur.
7. What is the best time of day for bird photography?
The morning golden hour (6:00–9:00 AM) and late afternoon (4:00–6:00 PM) offer the best combination of low-angle light and peak avian feeding activity.
8. How do I isolate birds from cluttered backgrounds?
Select wide apertures (f/4–f/5.6), shoot from eye level to push the background further away, and shift your position slightly to place the subject against clean foliage.
9. Should I leave space in front of a flying bird?
Yes. Position the bird off-center with open space ahead of its flight path to create visual direction and balance.
10. What are the best bird photography locations in India?
Top locations include Keoladeo National Park in Rajasthan (300+ species), Western Ghats in Kerala/Tamil Nadu (400+ species), Ranganthittu in Karnataka (200+ species), and Eaglenest in Assam.
11. How do I approach wild birds without causing them to flush?
Walk slowly at an angle rather than heading directly toward the subject. Take a few paces, stop to take a frame, and wait for the bird to resume feeding before advancing further.
12. What aperture gives the best balance between sharpness and background blur?
An aperture of f/4 to f/5.6 delivers the best balance, keeping the entire head sharp while creating a soft background.
13. Is shooting at ISO 6400 acceptable for bird photography?
Yes. Modern camera sensors paired with AI-driven noise reduction tools handle ISO 6400+ cleanly. A sharp, well-exposed image with minor noise is preferable to a blurry image taken at low ISO.
14. Should I use Manual mode or Aperture Priority?
Use Manual Mode with Auto ISO. This lets you lock in the necessary shutter speed and aperture while the camera automatically balances the exposure.
15. Why should bird photographs always be captured in RAW?
RAW files retain all uncompressed sensor data, providing the latitude needed to recover highlights in pale feathers and lift shadows in dark underwings.
16. When should I switch between single-point and wide-area autofocus?
Use a precise single point when a bird is perched inside dense branches or reed beds. Switch to wide-area tracking when photographing birds flying across open sky or water.
17. Why is artificial flash prohibited or discouraged in bird photography?
Flash lacks the reach for distant subjects and can temporarily startle wild birds, disrupting feeding or nesting cycles.
18. What is the modern double focal length shutter speed rule?
The modern rule states that your shutter speed should be at least double your focal length (e.g., 500mm = 1/1000s minimum) to prevent micro-blur on high-resolution digital sensors.
19. How does adding a foreground element improve a bird photo?
Shooting through out-of-focus leaves or grass adds depth and natural framing, creating a three-dimensional perspective.
20. Can modern smartphones produce quality bird photographs in the field?
Smartphones with dedicated 3x to 5x optical lenses (roughly 300mm equivalent) can capture quality portraits of accessible park birds when stabilized on a tripod in good light. However, they remain limited for distant or fast-flying wildlife.
Conclusion
Successful bird photography relies on a combination of technical discipline, optical reach, and field awareness. Setting fast shutter speeds (1/500s for perched subjects and 1/2000s–1/4000s for action), locking focus on the near eye, shooting from eye level, and working during golden-hour windows ensures sharp, engaging images. Pair these camera techniques with ethical field habits—moving quietly, avoiding habitat disturbance, and respecting animal boundaries—to document the wild bird world effectively and responsibly.